| FancyProgressbar - 3 (User control) | |||||||||||||||||||
| . | |||||||||||||||||||
| Version: 180430Sa | |||||||||||||||||||
| . | |||||||||||||||||||
|
|||||||||||||||||||
| . | |||||||||||||||||||
| Few days ago I specially searched on hard-drive of computer for an application I had made some years ago in c# (c sharp) for demonstrating a progressbar (user control). I had made that demonstration applicaton for testing progressbar usercontrol I had made in c# (c sharp). After finding that application I ran it for some time and after testing/revising it's different options I took and saved some screen-shots at different levels/states of application. I did that for sharing online. I had named that progressbar "FancyProgressbar - 3". | |||||||||||||||||||
| . | |||||||||||||||||||
| In this blog entry I am going to discus that progressbar in some detail. | |||||||||||||||||||
| . | |||||||||||||||||||
| First the purpose of making this progressbar was to have a progressbar which can display progress status of the process over it. This progressbar can display, user chose-able, following type of information over it: | |||||||||||||||||||
| . | |||||||||||||||||||
|
|||||||||||||||||||
| . | |||||||||||||||||||
| Following are some screen-shots of the above mentioned progressbar demonstrating application I made in c#. | |||||||||||||||||||
| . | |||||||||||||||||||
| . | |||||||||||||||||||
| [ (1) Application loaded] | |||||||||||||||||||
| Application is loaded and is ready for use. | |||||||||||||||||||
| . | |||||||||||||||||||

|
|||||||||||||||||||
| . | |||||||||||||||||||
| . | |||||||||||||||||||
| . | |||||||||||||||||||
| [(1a) Application tab is active] | |||||||||||||||||||
| Application tab, out of it's three tabs, is active. | |||||||||||||||||||
| . | |||||||||||||||||||

|
|||||||||||||||||||
| . | |||||||||||||||||||
| . | |||||||||||||||||||
| [(1a1) Error generation] | |||||||||||||||||||
| Generate ERROR during process option (CheckBox) is checked/selected. Purpose of this option is to have ability to generate ERROR programmatically during process for testing purpose. When this option is checked process randomly aborts between progress percent of 33 to 66. | |||||||||||||||||||
| . | |||||||||||||||||||

|
|||||||||||||||||||
| . | |||||||||||||||||||
| . | |||||||||||||||||||
| [(1a2) Progressbar width] | |||||||||||||||||||
| Progressbar with is modified (increased). Purpose of this option is to have ability for test application to change width of progressbar for testing. | |||||||||||||||||||
| . | |||||||||||||||||||

|
|||||||||||||||||||
| . | |||||||||||||||||||
| . | |||||||||||||||||||
| [(1a3) Progressbar text] | |||||||||||||||||||
| Progressbar text options are expended. Purpose of this option is to give ability to select different combination of text/information over progressbar. | |||||||||||||||||||
| . | |||||||||||||||||||

|
|||||||||||||||||||
| . | |||||||||||||||||||
| . | |||||||||||||||||||
| [(1a4) Process related] | |||||||||||||||||||
| . | |||||||||||||||||||
| [(1a4a) Start button clicked] | |||||||||||||||||||
| [Process is running . . .] Start button is clicked and process is started and is running. Progressbar background color is light-Blue and progressbar color is dark-Green. Progressbar is displaying from left to right progress percent completed, time elapsed, progress state i.e. working, Time remaining, progress percent remaining. | |||||||||||||||||||
| . | |||||||||||||||||||

|
|||||||||||||||||||
| . | |||||||||||||||||||
| . | |||||||||||||||||||
| [Process completed successfully] Start button was clicked and process was started and process is completed successfully. Progressbar background color is light-Blue and progressbar color is dark-Green. Progressbar is displaying from left to right progress percent completed, time elapsed, progress state i.e. working, Time remaining, progress percent remaining. | |||||||||||||||||||
| . | |||||||||||||||||||

|
|||||||||||||||||||
| . | |||||||||||||||||||
| . | |||||||||||||||||||
| [(1a4b) Cancel button clicked] | |||||||||||||||||||
| During a running process Cancel button is clicked and process aborted itself. Progressbar color is changed to Orange. | |||||||||||||||||||
| . | |||||||||||||||||||

|
|||||||||||||||||||
| . | |||||||||||||||||||
| . | |||||||||||||||||||
| [(1a4c) ERROR generated] | |||||||||||||||||||
| During a running process ERROR is generated programmatically. This happened because "Error generation" CheckBox was checked. Progressbar color is changed to Red. | |||||||||||||||||||
| . | |||||||||||||||||||

|
|||||||||||||||||||
| . | |||||||||||||||||||
| . | |||||||||||||||||||
| [(1b) Help tab is active] | |||||||||||||||||||
| Useful information about application are displayed in this Help tab | |||||||||||||||||||
| . | |||||||||||||||||||

|
|||||||||||||||||||
| . | |||||||||||||||||||
| . | |||||||||||||||||||
| [(1b1) About and Author] | |||||||||||||||||||
| In this image About and Author sections of Help tab are visible. About section displays basic information about application. Author section displays basic information about author of application i.e. me "Khursheed Fateh". | |||||||||||||||||||
| . | |||||||||||||||||||

|
|||||||||||||||||||
| . | |||||||||||||||||||
| . | |||||||||||||||||||
| [(1b2) How to Use] | |||||||||||||||||||
| Help tab's "How to Use" section in simple text describes/explains how to use this application. | |||||||||||||||||||
| . | |||||||||||||||||||

|
|||||||||||||||||||
| . | |||||||||||||||||||
| . | |||||||||||||||||||
| [(1b3) Features of Progressbar] | |||||||||||||||||||
| "Features of Progressbar" section of Help tab describes and explains different features of this application. This section is further divided into 2 parts. (Labels: Three type of information displayed over progressbar), (Status: Five status options for progressbar). | |||||||||||||||||||
| . | |||||||||||||||||||

|
|||||||||||||||||||
| . | |||||||||||||||||||
| . | |||||||||||||||||||
| [(1c) Exit tab is active] | |||||||||||||||||||
| User can EXIT from this application only from here. This tab displays a button with text "EXIT FROM HERE". Clicking this button closes this application. This button occupies entire area of the tab and has red background color and white text color. | |||||||||||||||||||
| . | |||||||||||||||||||

|
|||||||||||||||||||
| . | |||||||||||||||||||
| . | |||||||||||||||||||
| [(1d) Application Exiting methods] | |||||||||||||||||||
| . | |||||||||||||||||||
| [(1d1) Application System menu is expanded] | |||||||||||||||||||
| Application's system menu is expanded by clicking on the application/form icon on Left-Top of the application form. | |||||||||||||||||||
| . | |||||||||||||||||||

|
|||||||||||||||||||
| . | |||||||||||||||||||
| . | |||||||||||||||||||
| [(1d2a) Close button of form is clicked] | |||||||||||||||||||
| Close button of the form situated on the right-top of the form is clicked and this opens a Hint window explaining how to exit from application. | |||||||||||||||||||
| . | |||||||||||||||||||

|
|||||||||||||||||||
| . | |||||||||||||||||||
| . | |||||||||||||||||||
| . | |||||||||||||||||||
| [(1d2b) Close option of System menu clicked] | |||||||||||||||||||
| First application/form icon on the left top of the formis clicked. Second System menu is displayed. Third Close option from System menu is clicked. This opens a Hint window explaining how to exit from application. | |||||||||||||||||||
| . | |||||||||||||||||||

|
|||||||||||||||||||
| . | |||||||||||||||||||
| . | |||||||||||||||||||
| [(1d2c) Alt+F4 is pressed on Keyboard] | |||||||||||||||||||
| Alt+F4 key combination is pressed from keyboard and this opens a Hint window explaining how to exit from application. | |||||||||||||||||||
| . | |||||||||||||||||||

|
|||||||||||||||||||
| . | |||||||||||||||||||
| . | |||||||||||||||||||
|
|||||||||||||||||||
| . | |||||||||||||||||||
| . | |||||||||||||||||||
| If there are any mistakes in this post then I will remove them whenever I will know about them. | |||||||||||||||||||
| . | |||||||||||||||||||

Wednesday, August 17, 2022
FancyProgressbar - 3 - (User Control) - 180430Sa

Wednesday, June 29, 2022
RGB Color space all colors (RGB24) - 201020Tu
| RGB Color space all colors - RGB24 | |||||||||||||||||||
| . | |||||||||||||||||||
| Version: 201020Tu | |||||||||||||||||||
| . | |||||||||||||||||||
|
|||||||||||||||||||
| . | |||||||||||||||||||
| Few years ago while going through different websites for getting some information about RGB color generation on computer I somehow stumbled upon a page of Wikipedia. Now today in 2022, I feel happy that I stayed at that Wikipedia page for enough time and did not move to some other page in any hurry. Information on that page was very interesting. Actually someone had made and shared an image containing all colors as individual pixels available in color-space RGB 24 bits. | |||||||||||||||||||
| . | |||||||||||||||||||
| Since then I started wondering how I can make such a interesting image myself. I was already playing with digital colors for decades and had already made different applications in different software for displaying all available colors in different color spaces. But this idea of having all available colors in one image looked worth a try to me. So I decided to give it a try. . | |||||||||||||||||||
| . | |||||||||||||||||||
| On PkT 2020 Oct 20 Tue, AM 02:01, UTC+05:00 I practically started making an application for generating images having all color-space RGB 24 bit colors available in them. After achieving required result I kept on experimenting with the code and made different algorithms for generating the required image. In one category of code I took colors in RGB color-space 24 bit as a 3D grid with size of each dimension 256 pixels. On each axis I named each position on any particular axis as a slice ranging from 0 to 255. Then I created code for plotting each slice for any axis from that grid as a 64 by 64 grid tiles on the target image. | |||||||||||||||||||
| . | |||||||||||||||||||
| Following are some screen-shots of the above mentioned application I made in c# for every one. | |||||||||||||||||||
| . | |||||||||||||||||||
| . | |||||||||||||||||||
| [Application loaded] | |||||||||||||||||||
| Application is loaded and is ready for use. | |||||||||||||||||||
| . | |||||||||||||||||||

|
|||||||||||||||||||
| . | |||||||||||||||||||
| . | |||||||||||||||||||
| [Application's menu Action] | |||||||||||||||||||
| Application's menu option "Action" expanded. | |||||||||||||||||||
| . | |||||||||||||||||||

|
|||||||||||||||||||
| . | |||||||||||||||||||
| . | |||||||||||||||||||
| [Application's menu Action/Process] | |||||||||||||||||||
| Application's menu option "Action / Process" expanded. | |||||||||||||||||||
| . | |||||||||||||||||||

|
|||||||||||||||||||
| . | |||||||||||||||||||
| . | |||||||||||||||||||
| [Application's menu Help] | |||||||||||||||||||
| Application's menu option "Help" expanded. | |||||||||||||||||||
| . | |||||||||||||||||||

|
|||||||||||||||||||
| . | |||||||||||||||||||
| . | |||||||||||||||||||
| [Application's menu Help/About] | |||||||||||||||||||
| Application's menu option "Help / About" selected. | |||||||||||||||||||
| . | |||||||||||||||||||

|
|||||||||||||||||||
| . | |||||||||||||||||||
| . | |||||||||||||||||||
| [Application's menu Help/UserInterface] | |||||||||||||||||||
| Application's menu option "Help / UserInterface" selected. | |||||||||||||||||||
| . | |||||||||||||||||||

|
|||||||||||||||||||
| . | |||||||||||||||||||
| . | |||||||||||||||||||
| [Application's menu Help/HowToUse] | |||||||||||||||||||
| Application's menu option "Help / HotToUse" selected. | |||||||||||||||||||
| . | |||||||||||||||||||

|
|||||||||||||||||||
| . | |||||||||||||||||||
| . | |||||||||||||||||||
| [Application menu Help/Copyright] | |||||||||||||||||||
| Application's option "Help / Copyright" selected. | |||||||||||||||||||
| . | |||||||||||||||||||

|
|||||||||||||||||||
| . | |||||||||||||||||||
| . | |||||||||||||||||||
| [Application Property section: Color depth] | |||||||||||||||||||
| Application's Propery section's "Image Color Depth" OptionList expended. | |||||||||||||||||||
| . | |||||||||||||||||||

|
|||||||||||||||||||
| . | |||||||||||||||||||
| . | |||||||||||||||||||
| [Application's Properties Image generation method menu] | |||||||||||||||||||
| Application's Properties "Image Generation Method" options menu expended.. | |||||||||||||||||||
| . | |||||||||||||||||||

|
|||||||||||||||||||
| . | |||||||||||||||||||
| . | |||||||||||||||||||
| [Application's Properties Image generation method: RGB] | |||||||||||||||||||
| Application's Properties "Image Generation Method" options menu "RGB" expended. | |||||||||||||||||||
| . | |||||||||||||||||||

|
|||||||||||||||||||
| . | |||||||||||||||||||
| . | |||||||||||||||||||
| [Propert'S Image generation method: RGB/RGB] | |||||||||||||||||||
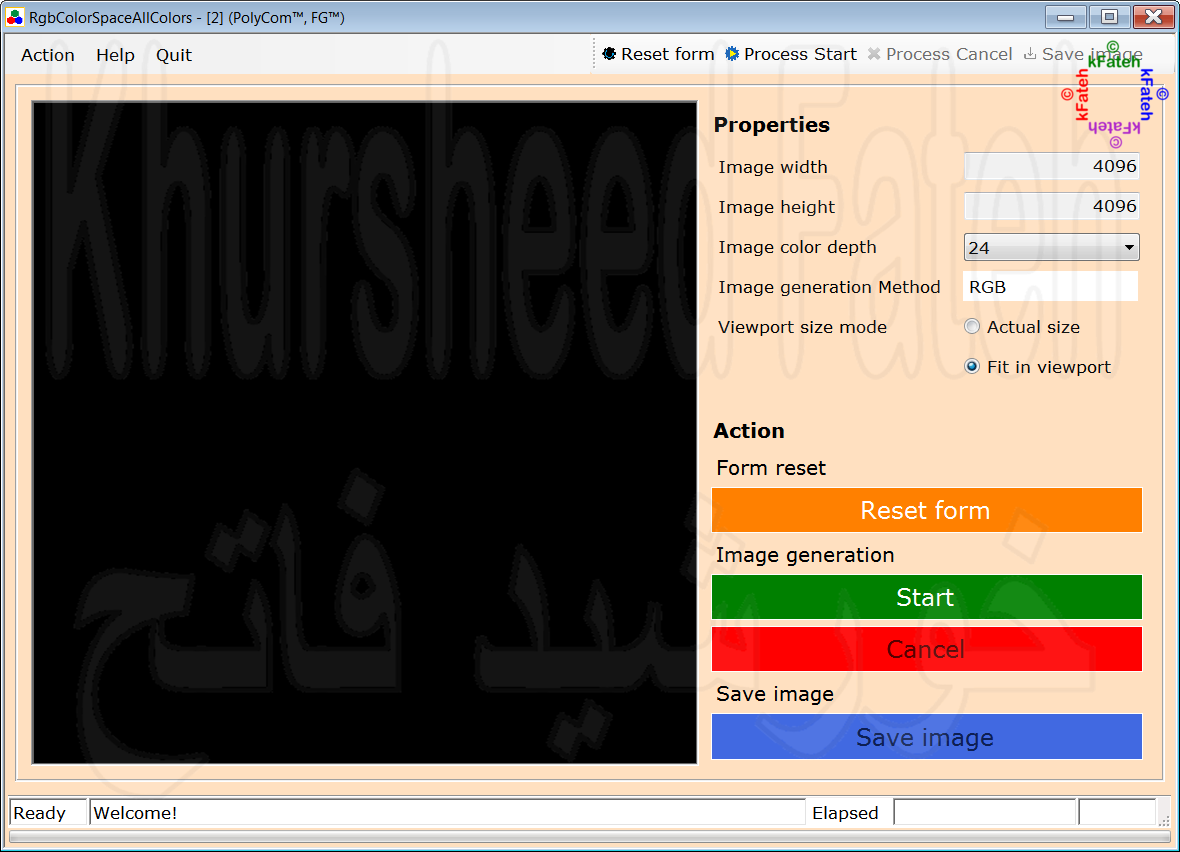
| Application's Propert's Image generation method options menu "RGB / RGB" selected. | |||||||||||||||||||
| . | |||||||||||||||||||
|
|||||||||||||||||||
| . | |||||||||||||||||||
| . | |||||||||||||||||||
| [Generating RGB/RGB image] | |||||||||||||||||||
| Application is generationg target Image using RGB/RGB method. | |||||||||||||||||||
| . | |||||||||||||||||||

|
|||||||||||||||||||
| . | |||||||||||||||||||
| . | |||||||||||||||||||
| [GB/RGB Image generated] | |||||||||||||||||||
| Target RGB/RGB image generated and displayed | |||||||||||||||||||
| . | |||||||||||||||||||

|
|||||||||||||||||||
| . | |||||||||||||||||||
| . | |||||||||||||||||||
| [Property's Image generation method: RGB/GRB] | |||||||||||||||||||
| Application's Property's Image generation method options menu "RGB / GRB" selected. | |||||||||||||||||||
| . | |||||||||||||||||||

|
|||||||||||||||||||
| . | |||||||||||||||||||
| . | |||||||||||||||||||
| [Generating RGB/GRB image] | |||||||||||||||||||
| Application is generationg target Image using RGB/GRB method. | |||||||||||||||||||
| . | |||||||||||||||||||

|
|||||||||||||||||||
| . | |||||||||||||||||||
| . | |||||||||||||||||||
| [RGB/GRB image generated] | |||||||||||||||||||
| Target RGB/GRB image generated and displayed. | |||||||||||||||||||
| . | |||||||||||||||||||

|
|||||||||||||||||||
| . | |||||||||||||||||||
| . | |||||||||||||||||||
| [Property's Image generation method: RGB/BRG] | |||||||||||||||||||
| Application's Property's Image generation method options menu "RGB / BRG" selected. | |||||||||||||||||||
| . | |||||||||||||||||||

|
|||||||||||||||||||
| . | |||||||||||||||||||
| . | |||||||||||||||||||
| [Generating RGB/BGR image] | |||||||||||||||||||
| Application is generationg target Image using RGB/BGR method. | |||||||||||||||||||
| . | |||||||||||||||||||

|
|||||||||||||||||||
| . | |||||||||||||||||||
| . | |||||||||||||||||||
| [RGB/BGR Image generated] | |||||||||||||||||||
| Target RGB/BGR image generated and displayed. | |||||||||||||||||||
| . | |||||||||||||||||||

|
|||||||||||||||||||
| . | |||||||||||||||||||
| . | |||||||||||||||||||
|
|||||||||||||||||||
| . | |||||||||||||||||||
| . | |||||||||||||||||||
| If there are any mistakes in this post then I will remove them whenever I will know about them. | |||||||||||||||||||
| . | |||||||||||||||||||
Monday, January 17, 2022
My concept mobile - 220117Mo
| My concept mobile | |||||||||||||||||||
| . | |||||||||||||||||||
| Version: 220117Mo | |||||||||||||||||||
| . | |||||||||||||||||||
|
|||||||||||||||||||
| . | |||||||||||||||||||
| Although I never had any interest in having any kind of mobile, but still I have had interest in acquiring information about different kind of mobiles. Mobile’s size, color, abilities and price used to be my main interest. With passage of time information I was gathering about mobiles slowly, slowly started to create an idea in my mind about my concept mobile. | |||||||||||||||||||
| . | |||||||||||||||||||
| . | |||||||||||||||||||
| [ Basic features so far of my concept mobile. ] | |||||||||||||||||||
| Following is the summery outline of the basic features of my concept mobile. | |||||||||||||||||||
| . | |||||||||||||||||||
|
|||||||||||||||||||
| . | |||||||||||||||||||
| . | |||||||||||||||||||
| . | |||||||||||||||||||
| In this background a few days ago on one cold night of January 2022 my eyes fell upon an out of use cardboard box in the dining room of our home. I quickly made an idea of making a prototype of my above discussed concept mobile from it. For this purpose I took a small sized kitchen knife and cut that cardboard box according to the required measurements. I actually made four rectangular pieces having size nearly like smart mobile phones. Then I fixed those four rectangular pieces together using masking tape in such a way that those pieces took the shape of a copy/book/etc. | |||||||||||||||||||
| . | |||||||||||||||||||
| [ Mobile's different panels explained ] | |||||||||||||||||||
| First think of my concept mobile as a book/copy. Just like a book/copy have front and back covers and pages in between it's covers my mobile will have front panel, rear panel and a few more panels in between it's front and rear panels. Mobile’s each panel will be for one or more specific purpose as explained below. | |||||||||||||||||||
| [ (a) - Front panel ] | |||||||||||||||||||
| This panel will contain display screen, front/selfie camera, many slots for SIM's and mobile's mother-board, processor etc. | |||||||||||||||||||
| [ (b) - Rear panel ] | |||||||||||||||||||
| This panel will contain rear cameras and many batteries. Idea is to make mobile continuesly work at full capacity for a full month after a full charge. | |||||||||||||||||||
| [ (c) - In between panels ] | |||||||||||||||||||
| They will be set of a few panels as explained in the following. | |||||||||||||||||||
| [ (c-1) - Memory panel ] | |||||||||||||||||||
| This panel will have a lot of slots for installing Ram, Internal and External storage media. This mobile will have single memory-set working as RAM and Internal memory with capacity of multiple of Terabytes. | |||||||||||||||||||
| [ (c-2) - SIM panel ] | |||||||||||||||||||
| This panel will have a lot of slots for installing a lot of SIM's in it. (Update: Mobile will not have this panel.Slots for sim will be available in front panel) | |||||||||||||||||||
| [ (c-3) - Expansion panel ] | |||||||||||||||||||
| This panel will have a lot of slots for installing expansion cards for increasing features of mobile and/or adding feature to mobile. | |||||||||||||||||||
| [ (c-4) - Battery panel ] | |||||||||||||||||||
| This panel will have a lot of slots for installing batteries. Idea is to make mobile continuesly work at full capacity for a full month after a full charge. | |||||||||||||||||||
| . | |||||||||||||||||||
| [ My concept mobile's different panels ] | |||||||||||||||||||
| Panels of my concept mobile are explained in the following photo. | |||||||||||||||||||
| . | |||||||||||||||||||

|
|||||||||||||||||||
| . | |||||||||||||||||||
| . | |||||||||||||||||||
| . | |||||||||||||||||||
| In the following I will further explain my concept mobile with the help of photos I took of it’s above mentioned basic prototype. These photos will also describe steps I took during making prototype of my concept mobile. | |||||||||||||||||||
| . | |||||||||||||||||||
| [ Step # 1 ] | |||||||||||||||||||
| In this step I got two rectangular cardboard pieces of same size by cutting a out of use cardboard box using a small kitchen knife. Knife can be seen in the photo for "Step # 2". | |||||||||||||||||||
| . | |||||||||||||||||||

|
|||||||||||||||||||
| . | |||||||||||||||||||
| . | |||||||||||||||||||
| . | |||||||||||||||||||
| [ Step # 2 ] | |||||||||||||||||||
| In this step I got four rectangular pieces of the same size by cutting the two pieces I got in the previous step "Step # 1". For cutting I used the small kitchen knife and for measuring size of required panels I used thread. Both can be seen in the following photo for this step "Step # 2". | |||||||||||||||||||
| . | |||||||||||||||||||

|
|||||||||||||||||||
| . | |||||||||||||||||||
| . | |||||||||||||||||||
| . | |||||||||||||||||||
| [ Step # 3 ] | |||||||||||||||||||
| After getting four cardboard pieces, as described in the above steps, I attached all those four pieces together with the help of a masking tape. Their final shape and purpose is described in the following photo of this step "Step # 3". | |||||||||||||||||||
| . | |||||||||||||||||||
|
|
|||||||||||||||||||
| . | |||||||||||||||||||
| . | |||||||||||||||||||
| . | |||||||||||||||||||
| [ Front and Rear view of mobile prototype ] | |||||||||||||||||||
| Following are the photos of my concept mobile displaying it's front and rear view. After making this prototype I made an idea that mobile will be of almost the same size as this prototype is. | |||||||||||||||||||
| . | |||||||||||||||||||

|
|||||||||||||||||||
| . | |||||||||||||||||||
| . | |||||||||||||||||||

|
|||||||||||||||||||
| . | |||||||||||||||||||
| . | |||||||||||||||||||
| . | |||||||||||||||||||
|
|||||||||||||||||||
| . | |||||||||||||||||||
| . | |||||||||||||||||||
| If there are any mistakes in this post then I will remove them whenever I will know about them. | |||||||||||||||||||
| . | |||||||||||||||||||
Thursday, December 16, 2021
Pakistan Indus basin forest - 210522Sa
| Pakistan Indus basin forest | |||||||||||||||||||
| .1);">. | |||||||||||||||||||
| Version: 210522Sa | |||||||||||||||||||
| . | |||||||||||||||||||
|
|||||||||||||||||||
| . | |||||||||||||||||||
| Since some decades I am wondering how we can grow man-made forest in our country, Pakistan. On different occasions different type of ideas came into my mind, some of which I had already discussed in some other post(s) in this blog. | |||||||||||||||||||
| . | |||||||||||||||||||
| Some days ago an idea came to my mind to calculate how many tree saplings will be required if we want to plant them on both sides of river Indus, largest river in our country. Idea was to calculate total number of tree saplings required if we plant one tree sapling after every “R” foot throughout the length of river Indus and plant one tree sapling after every “C” foot sideways on both sides of river. | |||||||||||||||||||
| . | |||||||||||||||||||
| After playing with different numbers for “R” and “C” I settled for 50 rows and 50 columns of tree saplings per square kilometer. This makes 2500 tree saplings per square kilometer. Length of river Indus is around 3000 kilometers. By multiplying length of river with number of tree saplings required per square kilometer we get number of tree saplings required for one side of river Indus and that is 7,500,000 tree saplings. To get number of tree saplings required for both sides I multiplied this number with 2 and got the number 15,000,000. | |||||||||||||||||||
| . | |||||||||||||||||||
| After a few days I started making a software version of that calendar and in a few days completed it's first version. This post is to describe Computer version (I made in 2020) of the Manual version (I made a few decades ago). | |||||||||||||||||||
| . | |||||||||||||||||||
| . | |||||||||||||||||||
| [ Indus basin forest calculation chart ] | |||||||||||||||||||
| Following is the summery chart of Indus basin forest calculation. | |||||||||||||||||||
| . | |||||||||||||||||||
|
|||||||||||||||||||
| . | |||||||||||||||||||
| . | |||||||||||||||||||
| [ Map Indus basin forest ] | |||||||||||||||||||
| Following is the map of proposed Indus basin forest. It is looking so beautiful and useful to me. | |||||||||||||||||||
| . | |||||||||||||||||||

|
|||||||||||||||||||
| . | |||||||||||||||||||
| . | |||||||||||||||||||
| . | |||||||||||||||||||
|
|||||||||||||||||||
| . | |||||||||||||||||||
| . | |||||||||||||||||||
| If there are any mistakes in this post then I will remove them whenever I will know about them. | |||||||||||||||||||
| . | |||||||||||||||||||
Subscribe to:
Posts (Atom)