|

Saturday, December 29, 2018
Happy Quaid-e-Azam day (2018 Dec 25)
Tuesday, September 18, 2018
My one gamla Kitchen garden - 180918Tu
|


Wednesday, August 15, 2018
Happy Pakistan independence day 2018
|
Monday, August 6, 2018

Monday, July 23, 2018
Simple Housing Scheme Plan - 180723Mo
| Simple Housing Scheme Plan |
| . |
| (An expandable idea) |
| Version: 180723Mo |
| . |
| Some years ago I was thinking how to improve over-all scheme of area where I live. During that period I made different plans, one after another. Each plan had their own set of plus and minus points. But because the area where I live was and is fully / mostly developed so there was no scope / chance for any major modification. Plus, all these years, I kept my these thoughts to myself and before sharing here never even hinted about it to any one. |
| . |
| After getting my that timely idea I started making my own concept multi-dimensional plan for some future housing scheme. Here I am going to share one dimension (Utility area: Limited to Play area cum park in this post) of that Plan. |
| . |
| Idea was to have a housing scheme which also has structured system of utility area (play area, green area 'area reserved for trees etc', school, market etc) for all type, age of people of area. So in any given time as many as possible number of people can utilize and enjoy them. |
| . |
| To achieve this target I divided my concept housing scheme into many set like layers. With layer 1 at bottom and layer N at top. Every layer except layer 1 was made of 10 units of immediately lower layer. Meaning layer 1 has no child layer and layer N have no parent layer. |
| . |
| These layers are explained with images in the following paragraphs. |
| .. |
| Layer 1: |
| This is basic or bottom layer of scheme. As can be seen in following image there is a green colored rectangular shaped utility area (play area in this case) in center of this layer and light-golden colored rectangular shaped 10 plots for houses are on two opposite and longer sides of it. This play area is shared by these 10 houses and any person can enter into this play area only through any one of these houses. This play area is made with privacy and safety like this so that it can be used by children under 5 years of age, of these 10 houses safely. |
| . |
| In the following image Purple color is used for outline of house plots, Utility area and Layer it self Green color is used for Utility area and Light-Golden color is used for House plots. |
| . |
| . |

|
| . |
| . |
| Layer 2: |
| This is 2nd layer from bottom of scheme. I explained before that every layer, except 1st layer, in this scheme is made by using a fixed number of Units from lower layer plus a Utility area. So, according to that rule, this 2nd layer is made up of 10 units of 1st layer and a utility area (play area and park in this case) is also allocated in center of this 2nd layer plan. This can be better under stood by observing following image. |
| . |
| As can be seen in the following image in this layer-2 rectangular shaped Utility area is in the center of the layer-2 and rectangular shaped 10 units of layer-1 are on two opposite and longer sides of it. In this layer-2 Utility area is surrounded by road for easy access for all. In this layer-2 Utility area is divided in many parts and each part is either a Park or Play area. Park will have jogging track, flower beds, trees, benches, swings and other useful items for children to play and enjoy. Play areas will be covered with net so that many persons or teams can use these play areas at any time. These play areas will be mostly for school children of the area. |
| . |
| In the following image Blue color is used for outline of Layer-2 and it's Utility area. Green color (any shade) is used for Utility area of Layer-2. Gray color is used for roads in Layer-2. Light-blue color is used for path ways around Utility area of Layer-2 Units of Layer-1 are used as it is. |
| . |
| . |

|
| . |
| . |
| Layer 3: |
| This is 3rd layer from bottom of scheme. I explained before that every layer, except 1st layer, in this scheme is made by using a fixed number of Units from lower layer plus a Utility area. So, according to that rule, this 3rd layer is made up of 10 units of 2nd layer and a utility area (play area, park, school, market etc in this case) is also allocated in center of this 3rd layer plan. This can be better under stood by observing following image. |
| . |
| As can be seen in the following image in this layer-3 rectangular shaped Utility area is in the center of the layer-3 and rectangular shaped 10 units of layer-2 are on two opposite and longer sides of it. In this layer-3 Utility area is surrounded by road for easy access for all. In this layer-3 Utility area is divided in many parts and each part is either a Park area, Green area, Play area, School area or Market area. Park area will have jogging track, flower beds, trees, benches, swings and other useful items for children to play and enjoy. Each Play area will be covered with net so that many persons or teams can use these play areas at any time. These play areas will be mostly for post school children and other elder persons of the area |
| . |
| In the following image Red color is used for outline of Layer-3 and it's Utility area. Green color (any shade) is used for Utility area of Layer-3. Gray color is used for roads in Layer-3. Light-blue color is used for path ways around Utility area of Layer-3. Units of Layer-2 are used as it is. |
| . |
| . |

|
| . |
| . |
| As can be observed the above mentioned scheme is simple and recursively defined. Meaning it can be expanded into next above level without any difficulty. It also retains its main look throughout its expansion up wards. Thus it is easy to implement any where in the world. |
| . |
| Plus this above mentioned scheme will reduce chances of children playing on streets, roads or on empty plots. Thus reducing the chance of any accident like risks. |
| . |
| Note: In above images outline color of Purple is used for Layer 1, Blue is used for Layer 2 and Red is used for Layer 3. Green color (any shade) is used for Utility area. |
| . |
Tuesday, June 26, 2018
Tower of Hanoi - 7 - c sharp - 180626Tu
| Tower of Hanoi in c# | ||||||||||
| . | ||||||||||
| (Console application) | ||||||||||
| Version: 180626Tu | ||||||||||
| . | ||||||||||
| Long time ago, for the first time, I came to know about 'Tower of Hanoi' puzzle game through a book on 'C/Turbo C' and another book on 'Data structure'. Both these books were in our course and both books were very good. | ||||||||||
| . | ||||||||||
| . | ||||||||||
|
||||||||||
| . | ||||||||||
| . | ||||||||||
|
||||||||||
| . | ||||||||||
|
|
||||||||||
| . | ||||||||||
| In 'C/Turbo C' book there was an example program for playing 'Tower of Hanoi' puzzle game (Chapter #: 16, Chapter name: C++ and Object-Oriented Programming, Section: Towers of Hanoi) and in 'Data structure' book there were 2 example algorithms for solving 'Tower of Hanoi' puzzle game (Chapter #: 6, Chapter name: STACKS, QUEUES, RECURSION, Section: 6.7 - TOWERS OF HANOI). | ||||||||||
| As far as i remember now, then I wrote both examples in 'Turbo C' and enjoyed playing with game as well as with code. That code was simple but good for 'C/Turbo C' learning level. Then time fast forwarded for around a decade and this time I made 'Tower of Hanoi' puzzle game in 'HTML / JScript' using beautiful and solid FrontPage. This time Game environment was much advance then before and more colorful also. | ||||||||||
| Again time fast forwarded for around a decade and this time in memory of my last efforts for 'Tower of Hanoi' I decided to re-make that puzzle game in c#. Because I was making this version in memory of last 2 efforts plus more so this time I made it as (a) 'Console application' and (b) 'Windows Forms application'. | ||||||||||
| Here in this post, in the following paragraphs, I am sharing 'Console application' version of 'Tower of Hanoi' puzzle game made by me in c#. | ||||||||||
| .. | ||||||||||
| Salient features of application: | ||||||||||
| This puzzle game is one player console based game. This puzzle game is controlled / played by keyboard keys. What keys are required when, is always displayed on screen. Mostly alphabets and arrow keys are required. | ||||||||||
| . | ||||||||||
| Screen shots of 'TowerOfHanoi_07' with description: | ||||||||||
| Following are screen shots of 'TowerOfHanoi_07' at different stages with their description. | ||||||||||
| . | ||||||||||
| Application on Load: | ||||||||||
| 'TowerOfHanoi_07' console application looks like in the following image when it loads. Author information is displayed on top row. Under that in green rectangle are displayed (a)_Game objective and (b)_Rules. Under that a prompt is displayed asking user how many disks he/she wants to play with. At the bottom of the screen is status line which displays (a)_Application mode 'Input' meaning application is expecting an input from user and (b)_Status message (Message tells what User needs to do or what Application is doing at any stage). | ||||||||||
| . | ||||||||||

|
||||||||||
| . | ||||||||||
| . | ||||||||||
| Game started: (Move disk from) | ||||||||||
| When none '0' (on '0' game quits) number of disks is entered in first screen game starts and following screen is displayed. Second line from top line tells what is expected / required from player. 3rd line form top tells (a) min. numbers of moves required for solving current puzzle and (b) current move number. Under 3rd line 3 towers in red (with selected number of disks on it in yellow colors), blue and green color are displayed. On line under towers game asks for and gets tower name for moving disk from. On status line useful information is displayed. Pressing 'X' here will end this game and take to first screen. | ||||||||||
| . | ||||||||||

|
||||||||||
| . | ||||||||||
| . | ||||||||||
| Game started: (Move disk to) | ||||||||||
| In this screen every thing is same as in 'Game started: (Move disk from)' screen except this time game is asking for and getting tower name for moving disk to. On status line useful information is displayed. Pressing 'X' here will end this game and take to first screen. | ||||||||||
| . | ||||||||||

|
||||||||||
| . | ||||||||||
| . | ||||||||||
| Game after some moves: | ||||||||||
| 'TowerOfHanoi_07' will look like in the following image after some moves. | ||||||||||
| . | ||||||||||

|
||||||||||
| . | ||||||||||
| . | ||||||||||
| Game completed: | ||||||||||
| 'TowerOfHanoi_07' looks like in the following image when it is completed. In 3rd line after Move # it is announced that game is completed. On line under tower a message is displayed to congratulate player and also tells in how many moves game is completed and in how much time. Under this line a message is displayed to tell player what to do now. In status line 'Message' field also 'Game completed!' is displayed. | ||||||||||
| . | ||||||||||

|
||||||||||
| . | ||||||||||
| . | ||||||||||
| Game aborted: | ||||||||||
| 'TowerOfHano_07' looks like in the following image when game is aborted by pressing 'X' when it asks for From or To tower. In 3rd line after Move # Aborted is displayed. On line under tower a message is displayed telling that current game is aborted after so many moves and in so much time. On line under this a message is displayed telling user what to do now. In status line in 'Message' field also 'Game aborted.' is displayed. | ||||||||||
| . | ||||||||||

|
||||||||||
| . | ||||||||||
| . | ||||||||||
| Exiting TowerOfHanoi_07: | ||||||||||
| 'TowerOfHanoi_07' looks like in the following image when '0' is pressed in 'get number of towers screen'. In this screen 1st row from top displays author information. Under that in a green rectangle (a)_departing message is displayed (b)_Time spent on game is displayed (c)_A message is displayed telling user what to do now. In status line on bottom of screen after 'Message' field 'Exiting from application . . .' is displayed. | ||||||||||
| . | ||||||||||

|
||||||||||
| . | ||||||||||
| . | ||||||||||
| [Note] During making screen shots of 'TowerOfHanoi_07' and adding water marks in those images I came across a small problem. That problem was that my water marks were in color and they were not looking good to me on black background. So to solve that problem I made a "Windows Forms application"/"WinForms" in c# for changing any/all colors in water mark image to white color. Water marks in images in this post are result of that application. | ||||||||||
| . | ||||||||||
| . | ||||||||||
| Enjoy Complete Source code of application written and compiled in visual studio 2010 Ultimate by me. Download it. Extract it. Read 'ReadMeFirst.txt' file and do as is explained in it. | ||||||||||
Thursday, June 14, 2018
New style of meeting room - 18Jun14Thu
| |||||||||||||||||||||
| . |
Tuesday, May 15, 2018
Education and Health for all - 180515Tu
| ||||||||||||||||||||||||||||||||||||||||||
| . |
Tuesday, February 27, 2018
RGB Color Viewer - 2 - c sharp - 180227Tu
| RGB color viewer in c# |
| . |
| (Displays RGB colors and let them pick) |
| (Written by me in c# 2010) |
| Version: 180227Tu |
| . |
| A few decades ago I made an application in html/JScript in windows 98 running over Pentium 2 for viewing all colors available in 24bit RGB. Result was excellent and exciting. I was able to watch all possible colors in one place so easily. Plus it was so colorful also. Then a few years ago I repeated that application in c# and this time I did that for viewing all 32bit ARGB colors. Result of this time was exciting again. |
| Every thing was going so fine and ok but suddenly a problem arises. Problem I was facing was that I was not able to find lighter or darker color easily for selected RGB color by scrolling Red, Green or Blue color values. Then I stumbled upon HSB/HSL color space and my problem got solved. But then new problem started. This time problem was to get any color in RGB color space and then get it's lighter or darker shade in HSB/HSL color space. So I made an application in c# for doing so. During that process I made some other utility applications as well. |
| One of those application was to display HSB colors with ability to copy selected color to clipboard. In that application colors were displayed via 2 colored rectangles. First I called Z box and initially used that for displaying Hue of HSB color. Second I called XY box and initially used that for displaying Brightness and Saturation of HSB color. During that process I found that by changing assignments for XYZ axis in both boxes, color view in XY box becomes interestingly different. |
| After that I made another application, this time for RGB color space. And I am sharing code for this RGB color space application here. |
| .. |
| Salient features of application: |
| In this application colors are displayed vie 2 color boxes. One is called Z box and other is called XY box. Initially Blue color is assigned to Z box. Green color is assigned to Y of XY box and Red color is assigned to X of XY box. Color assignment for XY and Z can be changed via 'Axis' menu. Color can be selected by mouse click, scrolling scroll bars or by entering values in Red, Green and Blue fields. Selected color's values are displayed in RGB and HSB section. Selected color can be copied to clipboard in decimal or hex format for bot RGB and HSB. All this is explained in 'How to use' and 'User Interface' of help menu' |
| . |
| Screen shots of 'RGB Color viewer' with description: |
| Following are screen shots of 'RGB Color viewer' at different stages with their description. |
| . |
| Application on Load: |
| 'RGB Color viewer' looks like in the following image when it loads. Menus are on top line and status is at bottom line. Area in between them is divided in 2 columns. In left column are 2 colored rectangles and 3 scroll bars. Rectangles display Red, Green and Blue part of RGB color. Scroll bars are for selecting value of respective color. In right column selected color information is displayed. At start Z is Blue, Y is Green and X is Red and their initial values are 175, 128, 128. |
| . |

|
| . |
| . |
| Help menu expanded: |
| 'RGB Color viewer' looks like in the following image when help menu is clicked. Showing it's 5 options: About, Purpose, User interface, How to use and Copyright. Each option of help menu is shown and explained separately in following. |
| . |

|
| . |
| . |
| Help/About: |
| 'RGB Color viewer' looks like in the following image when 'About' in 'Help' menu is clicked. This menu-item displays basic information about application and it's author. |
| . |

|
| . |
| . |
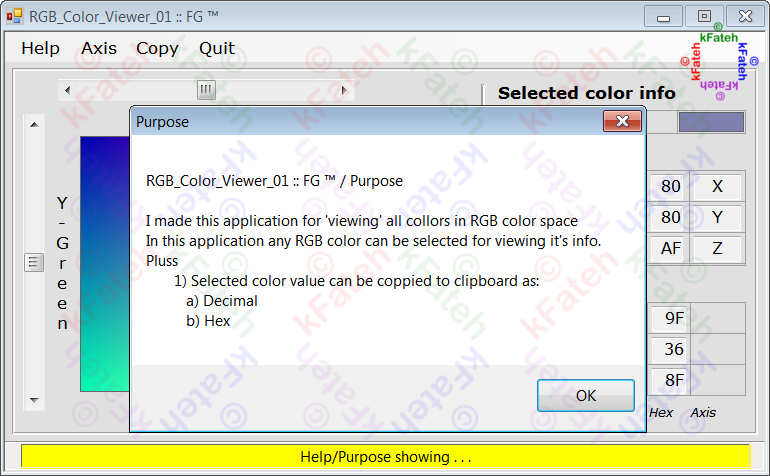
| Help/Purpose: |
| 'RGB Color viewer' looks like in the following image when 'Purpose' in 'Help' menu is clicked. This menu-item displays text explaining purpose of the application. |
| . |
|
| . |
| . |
| Help/User interface: |
| 'RGB Color viewer' looks like in the following image when 'User interface' in 'Help' menu is clicked. This menu option explains application's user interface as visible in following image. |
| . |

|
| . |
| . |
| Help/How to use: |
| 'RGB Color viewer' looks like in the following image when 'How to use' in 'Help' menu is clicked. This menu option explains how to use this application as visible in following image. |
| . |

|
| . |
| . |
| Help/Copyright: |
| 'RGB Color viewer' looks like in the following image when 'Copyright' in 'Help' menu is clicked. This menu-item displays copyright text for this application. |
| . |

|
| . |
| . |
| Help/Axis: |
| 'RGB Color viewer' looks like in the following image when 'Axis' menu is clicked. Showing it's 6 options with all possible color combinations for xyz axis. Clicking on any of these options updates colors of xyz axis. |
| . |

|
| . |
| . |
| Colors for axis changed: |
| 'RGB Color viewer' looks like in the following image when 'RGB (ZXY)' is clicked in 'Axis' menu. Colors for X, Y and Z axis are changed and Z and XY boxes are updated. |
| . |

|
| . |
| . |
| Help/Copy: |
| 'RGB Color viewer' looks like in the following image when 'Copy' menu is clicked. This menu allows copying to clipboard RGB or HSB values in decimal or hex. |
| . |

|
| . |
| . |
| Outputs for all Axiz values: |
| I liked the look of colors in XY box when I changed axis values from 'Axis' menu and enjoyed as well. All options from 'Axis' menu gave good looking result. Screen shot of 'RGB Color viewer' for all axis values when values for Red, Green and Blue are set to 128 are displayed in following images. |
| . |
| XYZ: |
| 'RGB Color viewer' looks like in the following image when axis is set to XYZ by clicking 'RGB (XYZ)' in 'Axis' menu. |
| . |

|
| . |
| . |
| XZY: |
| 'RGB Color viewer' looks like in the following image when axis is set to XZY by clicking 'RGB (XZY)' in 'Axis' menu. |
| . |

|
| . |
| . |
| YXZ: |
| 'RGB Color viewer' looks like in the following image when axis is set to YXZ by clicking 'RGB (YXZ)' in 'Axis' menu. |
| . |

|
| . |
| . |
| YZX: |
| 'RGB Color viewer' looks like in the following image when axis is set to YZX by clicking 'RGB (YZX)' in 'Axis' menu. |
| . |

|
| . |
| . |
| ZXY: |
| 'RGB Color viewer' looks like in the following image when axis is set to ZXY by clicking 'RGB (ZXY)' in 'Axis' menu. |
| . |

|
| . |
| . |
| ZYX: |
| 'RGB Color viewer' looks like in the following image when axis is set to ZYX by clicking 'RGB (ZYX)' in 'Axis' menu. |
| . |

|
| . |
| . |
| [Note: During first posting] During development I gave this application 'Color-Model-RGB-Space-RGB-2' as name but during writing this post I used 'RGB-Color-Viewer-2' as it's name. In it's next version I will use 'RGB-Color-Viewer-x'' as it's name during development also. |
| [Note: 2018 02 27 Tue _ PST 05:52 PM] LoL by mistake during development (for changing name of project) I gave it 'RGB_Color_Viewer_01' name but in this post I used 'RGB-Color-Viewer-2' as it's name. I am not going to change anything (project's name or post's title) any more. |
| . |
| Enjoy Complete Source code of application written and compiled in visual studio 2010 Ultimate by me. Download it. Extract it. Read 'ReadMeFirst.txt' file and do as is explained in it. |
Subscribe to:
Posts (Atom)